So this is what the first drafted pattern looks like. Front and back parts are similar to a jacket bodice only smaller in the width (they don't have to wrap the body all way around). There is the small puff sleeve and then the large sleeve of the cape connecting to the sides of the bodice. The collar is a rounded half-roll. May make a stand collar though? The rest are the facings.

So here is the pattern printed and laid on the fashion fabric so I can see if I have enough. I have plenty, thanks god (it wasn't really that a bargain fabric as I am always proud of - I think I paid 15 eu for it. Hmm still not bad!) ! I may make it a bit longer, or make a wide belt, or make an attachable hood. I think I like the belt idea most - I could make slits at the waist between bodice and sleeve so that one can pull the belt through.
You can see first changes on the pattern - the sleeve was not wide enough so I can move my arms...

Next step was to make a muslin out of a fabric I dearly hated. I got it in a package from ebay with the yellow dotted silk.
Funny backstage fact: I first though that the colours were awfully pale. I thought that for months! When I was cutting it I understood I was always looking at the wrong side of the fabric. It is like one of this IQ tests... So the colours on the right side are indeed OK, but it still looks like a tablecloth to me...
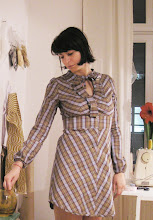
So currently I am checking the muslin. First thing - the pattern is too wide. The length at the shoulders is too much and I must work on the sleeve so it behaves the way I want it to!

You can enlarge the photos.
So I still have some work to do on this one. When the muslin works the way I want it I will mark the changes on the paper pattern and later I will redraft the pattern in my computer, so I can upload it again. It is quite a lot of fun uploading patterns - and I draft them for myself anyway...
I think this one is really easy to enlarge, since it has to fit mostly at the shoulder area.
I want to finish it till next weekend if I can.
I notice I didn't posted a photo of the grey-green jeans I made the tutorial of. Here is one. The are quite comfortable, but not as stretchy as the black one I made some time ago. The corduroy had 4% elastan. Same was written on the black fabric but they still behave differently. Mystery.
What I changed with this one, but maybe not so clear on the photograph is that they are longer and wider at the foot - like little foot trumpets. I like that. I can pull them over the shoes.

Buy for now!


